| |
|
Birth
of a Mural
Del
Norte High School - 2003
There are some experiences
that can cement the bonds of friendship for a lifetime.
Some projects are so special that they seem to take on a
life of their own and come up in conversation twenty years
later. While we recognize that building a mural is not exactly
comparable to walking on the moon, we find that mural construction
gives that same sense of group accomplishment.
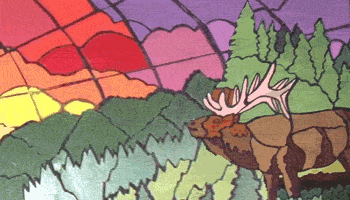
Please enjoy this step
by step guide to the process of building an original ceramic
puzzle mural. The guide is illustrated with photographs
from the Del Norte High School Mural project. For more information
about building ceramic puzzle murals, email Harley
Munger.
|
|
Process of Building a Mural
Click on any of the pictures for a more detailed
photo.
Step
1 : Get all your ducks in a row
So you want to build a
mural. Now what? First you need to determine the content
of the mural. Is there an overall concept? Will it match
any particular theme? Where will it be placed? Do you have
a specific goal in mind? Find out what organizations are
interested in getting involved with funding and labor. Once
you have that information, do an artistic rendering of the
design and break it down into puzzle-type shapes that will
all fit together.
|
|
Step
2: Make your ducks into templates
Transfer
the initial design onto plastic templates. Each cut-out
should represent a single piece of the puzzle mural. Make
sure to number each piece very clearly so that the puzzle
can be reassembled with minimal effort.
|
|
Step
3: Toss those ducks in the oven
Use
the templates to cut out individual puzzle pieces from the
clay. Make sure to transfer the numbering system. Then place
the puzzle pieces into the kiln and fire at "bisque"
temperature, 1915 degrees. Each piece is then individually
glazed with the correct color -- all glazes are handmade
to the project -- often times students assist in that process,
learning both math and chemistry.
|
|
Step
4: Assemble the pond
The
tiles are fired one more time at their final glaze temperature
of 2232 degrees. Allow the tiles to fully cool. The tiles
are then removed from the kiln and assembled on a large
flat surface, leaving room for grout all around.
|
|
Step
5: Tape their feathers in place
They
are taped together once assembled for easier installation,
making it easier to install and grout the groups rather
than the individual tiles. Once again, we make sure that
all the proper markings are clearly visible.
|
|
Step
6: Make sure they flock together
The
groups of tiles are then grouted. The color of grout must
be chosen very carefully because it is going to be one of
the most prominent colors in the mural. We make sure to
use a color that is complimentary to the overall scheme
of the design.
|
|
Step
7: Release them into the wild
The
mural is than cleaned of its grout residue and polished
with a soft cloth. A coating of sealer is put on a few days
later, when the grout is fully set. Often times larger murals
can be installed on a metal frame so that they can be moved
if necessary.Students are safely involved in every aspect
of the process.
|
|
Visit
our Public Murals page
or
School
Murals page
|
|

